
Making a curved vented sleeve cuff
- MingMakes

- Apr 26
- 6 min read
Having refined the fit of my bodice block, it was time for another wearable toile. To avoid this looking too similar to my previous one, I changed the sleeve to add some variety. I thought about a curved vented sleeve cuff, as a small drafting exercise to try.

The cuff I designed has one vent on the outside of the sleeve, level with the centreline. The steps below are the result of my fiddling about and trying to work through the design and construction. There may be better ways, but if I go through the process myself I gain a better understanding of what is required for the final result.

Here are the steps I took:
Making the pattern pieces
Decided on the length of the cuff
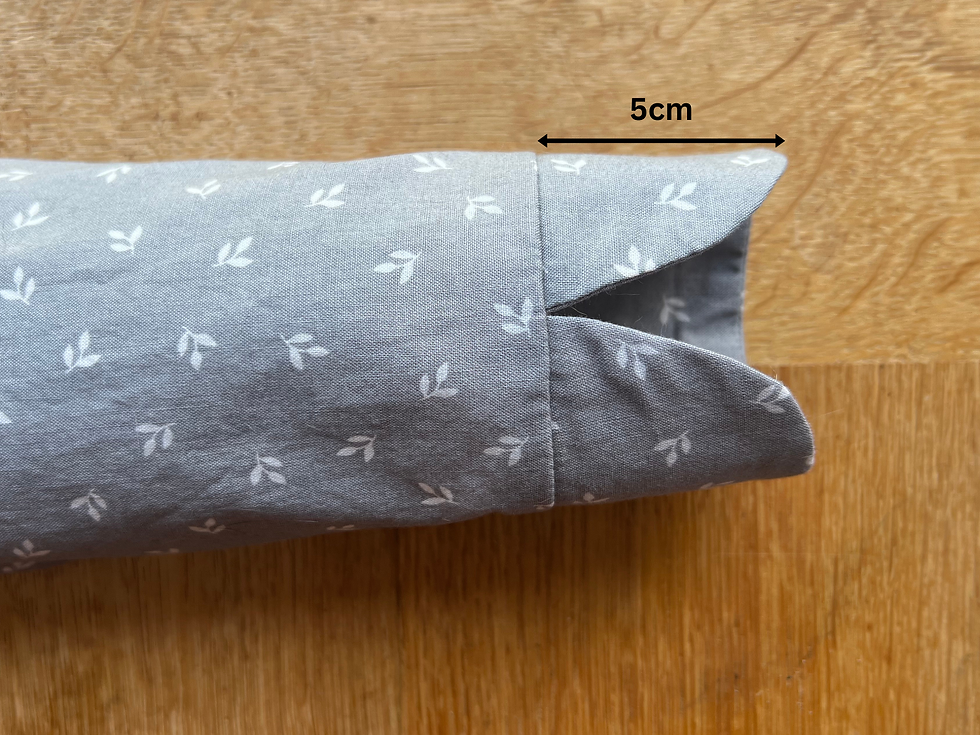
I wanted the cuff to be part of a full length sleeve. This meant I knew where the cuff would end, but needed to decide on the length of the cuff itself. To do this I had a strip of fabric that I folded to various lengths to see what looked in proportion to my arm and wrist. I decided on a length of 5cm.
Copied the lower part of my sleeve pattern piece
I didn't want to draw on my original sleeve pattern and so I copied the bottom half to fiddle around with. Other lines such as the 3/4 sleeve hem were marked so I could overlay this accurately on the original pattern for reference.

Split the pattern into sleeve and cuff
The overall sleeve length was to remain the same, so I marked a line 5cm (my chosen length of cuff) from the hem.

I drew on the shape of the curve that I wanted on the cuff on one side, then folded the piece back on itself along the centreline and traced it on the other side for symmetry.

I cut across the seam line to separate the sleeve from the cuff, and added a seam allowance of 1.5cm / ⅝" to each piece.

Created each pattern piece
Each cuff now had two pieces - one for the front of the sleeve and one for the back, as the centreline is not exactly down the centre of the sleeve. In addition, I have a different sleeve pattern for my left and right sides, and so I repeated the stages above for the other sleeve, creating four different cuff pieces.

Added notches
It would be easy to get these four pieces mixed up and so I added notches to the sleeve ends and cuff pieces to help reduce errors when it came to assembling the cuff:
At the top of the cuff piece matching one at the bottom of the sleeve end
I used one notch to mark the front pieces, and two notches to mark the back pieces. Since I had different L and R sleeve patterns, I ensured the notches were staggered to ensure the L front cuff wouldn't match the R front sleeve for example.
At the underarm seam
Again, as I had different L and R sleeves, I staggered the notches to ensure the L front piece wouldn't match the R back piece.

Marked stitching line on the curved edge for accuracy
Using Saral transfer paper and a tracing wheel, I marked the stitching line. I find sewing round curves a little tricky to keep the seam allowance accurate all the way, and so this helps me keep the stitching line where intended. I reinforced the line by drawing over with a Prym Aqua Trick Marker.

Construction
Since most people would have the same sleeve pattern for left and right sides, the steps detailed below apply to having just one sleeve pattern that is cut as a mirrored pair. Just to be really clear about the terms I'm using in my descriptions:
- Front means the cuff piece that will sit at the front of the sleeve/arm, as opposed to the back of the sleeve/arm
- Outer means the public side of the cuff, as opposed to the facing that will be on the inside of the cuff against the skin
Cut fabric
Each cuff pattern piece is cut as a mirrored pair twice over, so for the front cuff you should end up with 4 pieces of fabric which will become:
Left sleeve front outer cuff
Right sleeve front outer cuff
Left sleeve front cuff facing
Right sleeve front cuff facing
You then repeat this with the cuff back pattern piece, leaving you with 8 pieces of fabric in total.
Cut interfacing and apply
Depending on your fabric, you may wish to interface only the facing, or both the facing and outer cuff. You can assess this by interfacing all the facing pieces, then laying two interfaced pieces together, and then one with interfacing and one without to see which combination has the right amount of structure.
My fabric was a cotton lawn, and after doing this test, I felt it sufficient only to apply it to the facing. I used lightweight fusible interfacing (Vlieseline 180).

Each front and back piece is cut as a mirrored pair on interfacing if only applying it to the facing, leaving you with 4 pieces. If applying it to the outer cuff as well, then you would have 8 pieces altogether.
Sew together at the underarm seams
This requires a little bit of concentration to ensure the right pieces are being sewn together, which translates as I did this wrong first time so had to cut all my pieces out again :) You want to sew the 8 pieces to end up with two entire outer cuff pieces, and two full facing pieces.
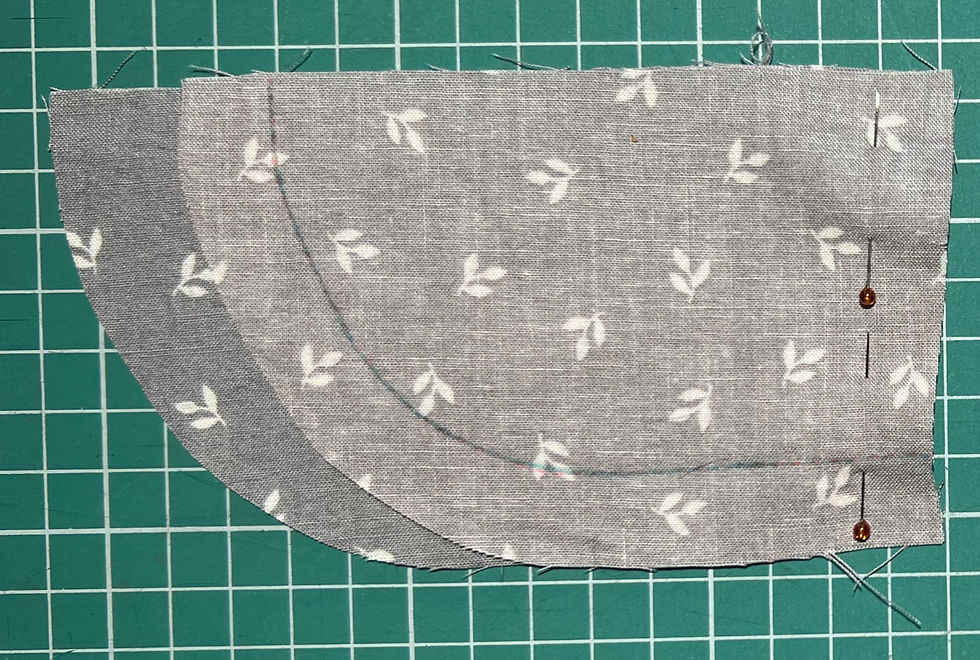
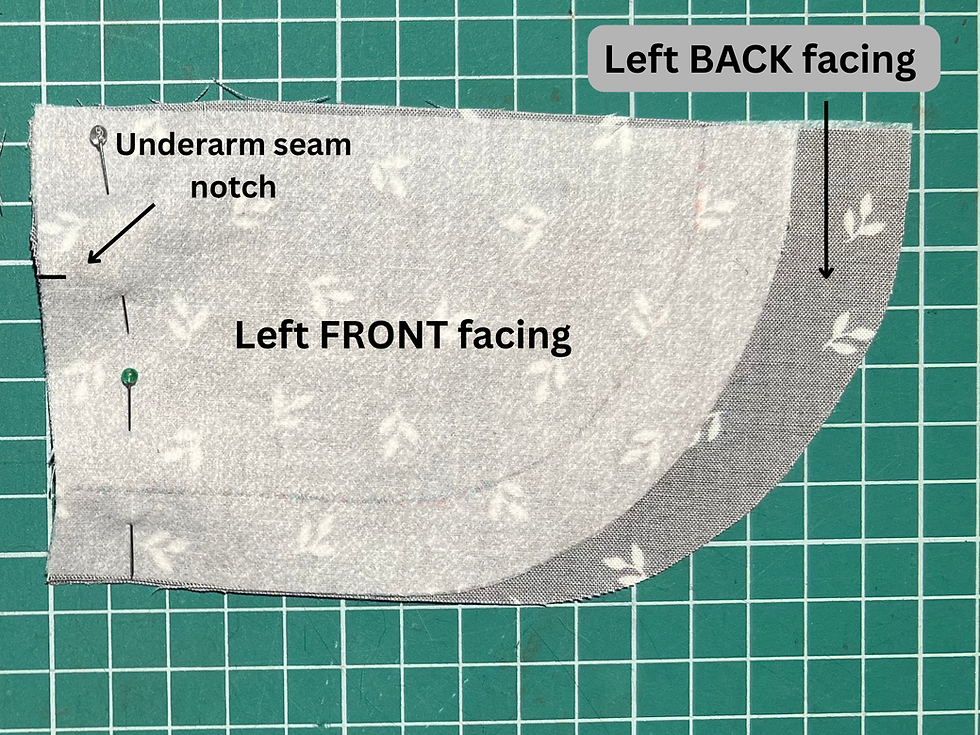
Matching notches at the underarm seam, place the left FRONT outer cuff piece and left BACK outer cuff piece right sides together.

Pin these together along the underarm seam and sew.
Trim the seam allowance and press open.

Repeat for the facings, placing the left FRONT facing piece right sides together with the left BACK facing piece.
Repeat steps a - d for the right side outer cuff and facing pieces
You should now have 4 pieces in total - 2 will form the outer cuff, and 2 will be the facings.

Sew each cuff
Matching notches and underarm seams, put one outer cuff piece and one facing piece right sides together. Then repeat for the other side.

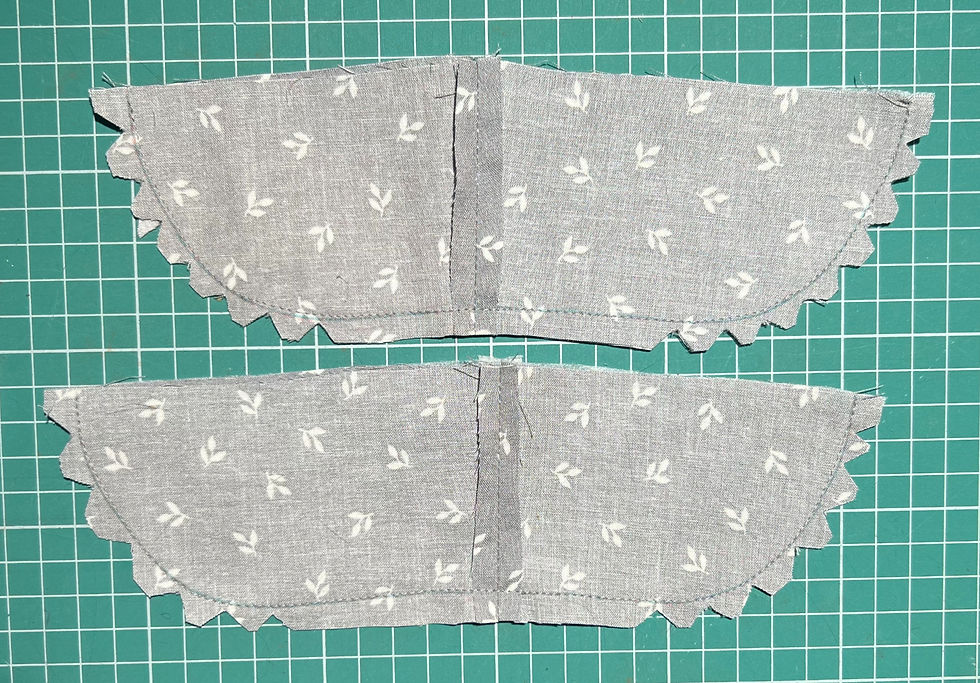
Pin and sew along the curved edge. Both left and right cuffs are shown below.
Trim the seam allowance and notch the curved edge.
Press seam allowance open. I wasn't very successful doing this around the curve and it isn't crucial, but it does produce a neater seam when turning it right side out.
Turn the cuff right side out and press, rolling the seam towards the facing. The photo below shows one cuff with the right side up, and one with the facing side up.

Sew the cuff to the sleeve
Baste the curved edges together
When doing a mock up of this cuff to figure out the construction, I had a gap between the curved edges.

To avoid this on my blouse, I basted a few handstitches to keep these edges together. I did this within the seam allowance on the facing side.

Matching notches and underarm seams, pin the cuff to the sleeve with right sides together.

I pinned from the cuff side so that when sewing it on the machine, the cuff was on top so I could ensure the stitching hit the split between the curves in a good position.

When pinning the underarm seam of the sleeve and cuff together, I was careful to place the pin in line of the seam allowances to ensure they matched up. However, they were offset because I had pinned the sleeve underarm seam to match the facing underarm seam, instead of the outer cuff underarm seam, as the two weren't exactly aligned.

I changed this on the second sleeve as shown below. The short white vertical line is the pin.

Not perfect but much better.

Sew the cuff to the sleeve. At the end I did a few extra stitches back and forth over the split to reinforce this area.
I then overlocked the seam allowance and pressed it towards the sleeve


I absolutely love this kind of project where I'm trying to reverse engineer a final result. Although this is a small element, it was such a great challenge to think about its construction. It reminded me of the fun I had making a cheongsam dress from an inspiration photo.

That was an epic project on a different scale, but it made me realise that I want to understand construction more, and that I need to figure things out for myself to see what makes sense. As much as I gain enormous satisfaction out of wearing a garment I've made from a pattern, having this extra input is even more rewarding.
Find me on Instagram, Facebook, YouTube, Bloglovin' or scroll to the bottom to subscribe to my newsletter which is published every month.
Links
I have no affiliations, I'm just a keen buyer and user. A UK supplier may be linked, please try to source items from your favourite independent stores.


Comments