
Elodie Wrap Dress
- MingMakes
- Apr 12
- 8 min read
I had signed up to a sewing retreat with Claire Tyler a year in advance, and I thought "That's plenty of time to get something prepared and cut out. I'll think about that nearer the time". Of course, when the time came life was busy as usual, and before I knew it I only had 2 weeks left. I therefore wanted something relatively straightforward to sew.
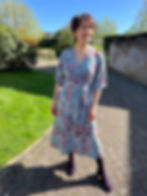
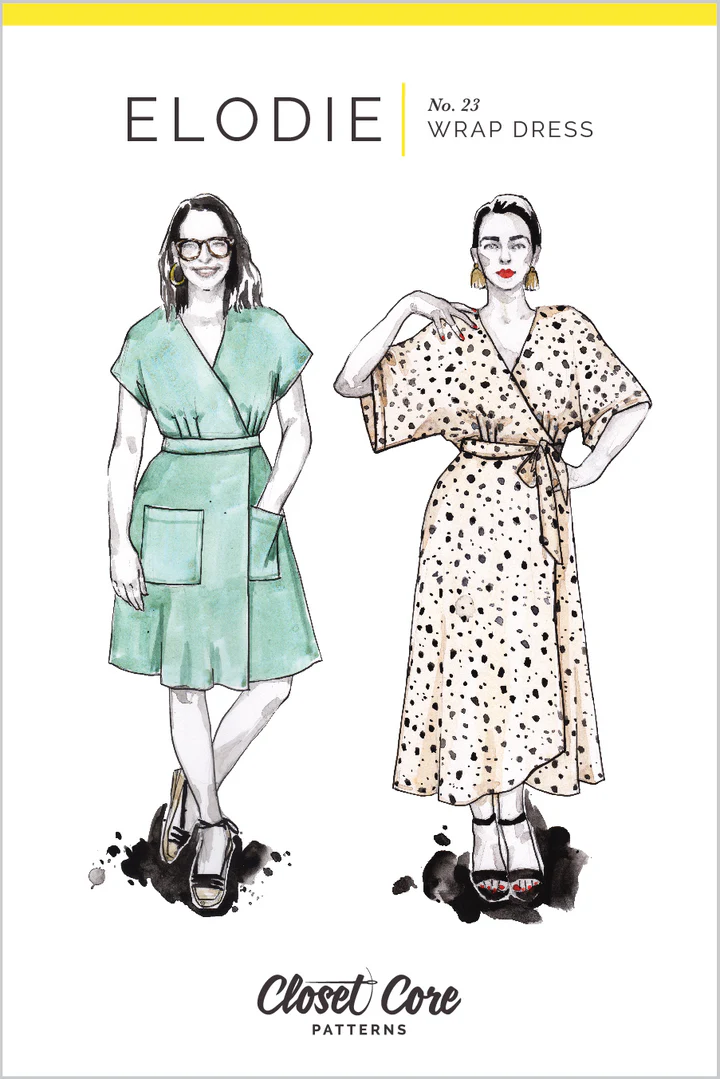
The Elodie Dress by Closet Core Patterns had been on my mind for a while as one I was keen to make. It has a lovely silhouette with a belted waist and blouson effect, and looks gorgeous in a drapey fabric. With my birthday coming up, I thought it would do the trick nicely as an outfit that looked polished, but also had flexibility to expand the waist for the afternoon tea I'd booked :)

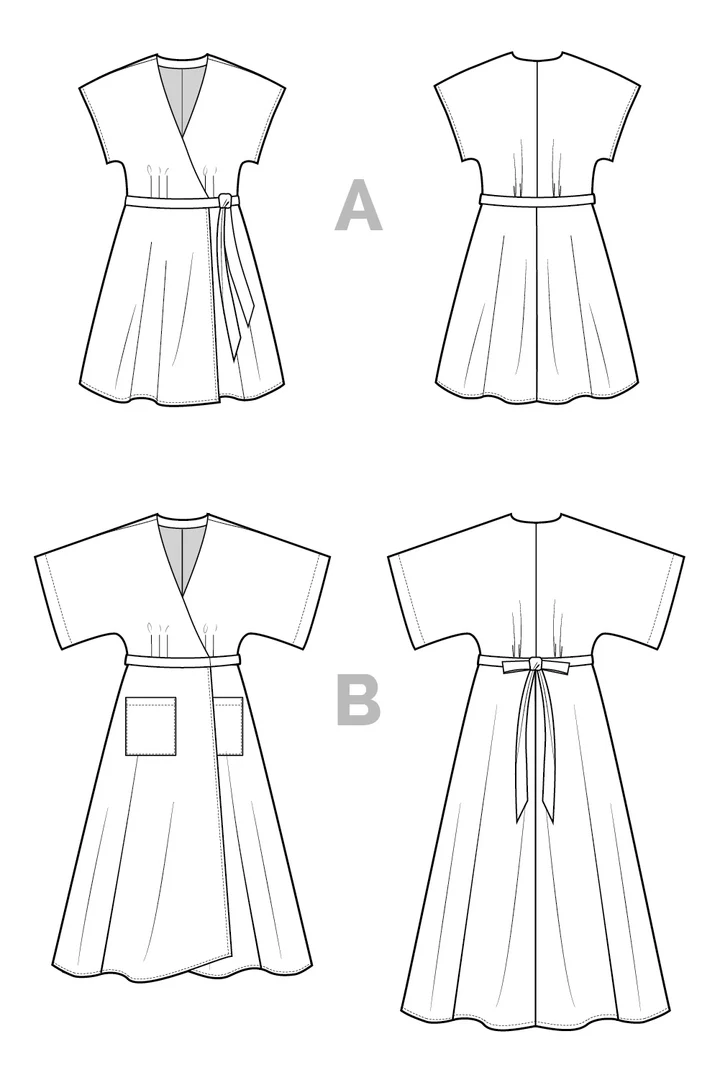
I made view B with long sleeves and midi length skirt, with self-drafted anchored side seam pockets instead of the patch pockets.
Fit
As usual I made a toile. Having used size 6 as a starting point with other Closet Core Patterns (Kelly Anorak and Sienna Maker Jacket), I cut this size and made adjustments from there. After my first toile I wanted to increase the waist, reduce bust volume and reduce excess fabric at the back.

I have detailed my fitting journey in a separate post, which shows photos of my toiles and the effect of my adjustments.

I also wanted to increase the underlap of the skirt and therefore the bodice to match, to help preserve modesty in a gust of wind. I have written another post which shows how I did this since differs slightly to Closet Core's guidance.

The photo below shows the good amount of coverage after the adjustment.

Fabric
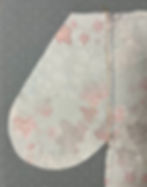
I used a lovely rayon twill that I bought while on holiday in Malaysia. It is gorgeously soft and drapey with a good weight so was perfect for this project.

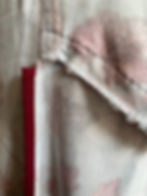
I used 25mm polycotton bias binding in burgundy to finish some of the seams inside. It matched the red in some of the flowers really nicely, and if I'd had more time to plan I may have used this binding on the outside to help provide a nice border to the dress and/or tie belt.

Cutting out
I didn't follow the suggested cutting layout because I had made several pieces wider to increase the wrap coverage, notably the left front bodice and left front skirt. I therefore mostly did single layer cutting to ensure I had enough fabric. The requirements for size 6 were 3.2m and I had 3.5m. After cutting the pockets, I still had some fabric left over.

I would normally have used a rotary cutter but for practicality at the retreat it was easier to use pins and scissors. This did not yield my neatest cutting, and with the fabric being quite drapey, I was grateful the loosely fitting dress could hide my inaccuracies here.
After applying fusible interfacing to the relevant pieces, I placed the pattern piece on top and recut round the edges to make it more accurate.

Construction
Binding
Facing
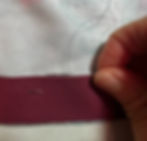
When it was time to finish the outer edge of the facing, I liked the suggestion of binding the edge rather than overlocking, turning under and topstitching. For one, I thought it might be a bit tricky to get a neat result on the tight curve which was bound to cause some gathers and pleats underneath. I also really like the neatness and sturdiness that bias binding affords.

Having taken suggestions from my fellow sewers, I pressed the binding open so I could use it with the Hong Kong binding technique. It is less bulky and you don't have to worry about whether you have caught all the binding at the back when stitching in the ditch. The original binding was quite wide and so I trimmed it down afterwards.

Centre back seams

Having admired how it looked around the edge of the facing, I also applied Hong Kong binding to the centre back seams on the bodice and skirt, knowing this would create a nice visual effect when the dress was on a hanger. I considered the shoulder seams, but I wanted the sleeves to drape fully and thought the binding might leave it slightly stiff.

When I came to bind the centre back seam of the skirt, I realised the stay stitching would show. If I'd thought about this at the time, I would have sewn it a bit neater and straighter :) I considered unpicking the stay stitching but for the relative visual disturbance I didn't think it was worth my time, plus I could always unpick it at a later date if I didn't like it. I have made a note to either sew it neater or use matching thread next time.
Another option would be to sew wider binding to help cover it but I preferred to keep the width consistent with the already sewn bodice.

An alternative to stay stitching would be to apply some sort of tape interfacing which would be less visible on the white backing of this fabric, or not even visible at all if strategically placed on the right side of the fabric. I have used Prym Forming Tape Interfacing in the past instead of stay stitching around necklines and it's very easy to use. Since the skirt seams are straight, I guess strips of interfacing would also do the trick.

Having initially sewn binding all the way down the centre back seam, I then removed the last 1.5cm that would be within the hem so that it wouldn't be so bulky when turned up twice for the hem. At this stage I didn't know whether I would want to take any more off the hem, but with me being on the slightly shorter side I was certain I wouldn't want it longer.

Front skirt edges
I had 25mm wide binding (measured with single fold) and decided to use it for the vertical edges of the front skirt pieces, but using the full width instead of the Hong Kong binding technique. Having already stay stitched 6mm from the raw edge, I pinned the opened binding against this line.

I then stitched along the open fold.
I could then press it back giving a nice neat edge to be handsewed with a slipstitch.

What I really liked about this was the structure it gave to the front wrap edge given my drapey fabric. It just seemed to hang nicely and had a solidness about it. It was also a nice detail seen if the wrap happened to waft in the wind.

Hem
I repeated the process as for the front skirt edges, and slipstitched in place.
Pockets

I added side seam pockets anchored to the waist to give them a bit more support given my drapey fabric. Claire kindly drafted a pocket pattern for me which I then extended up to meet the waistband. I estimated the position of the pocket by just holding the pattern piece up to the side of my hips, the pattern piece then being 24cm long at the side seam (including seam allowances).

I sewed the pockets to each of the side seams right sides together with a 1cm seam allowance so this would sit inside the side seam where the allowance is 1.5cm. I overlocked the raw edge and then understitched the seam allowance towards the pocket.
Here is a close up view to show what all the lines of stitching are.

Having compared to an existing pair of trousers, I made the pocket opening 16cm and applied strips of lightweight fusible interfacing (Vlieseline H180) to help reinforce the opening. I cut the strips 20cm long and 2cm wide and fused them at the seam allowance.

After pinning the front and back pieces together, I sewed all around the edge of the pocket and down the side seams, reinforcing the bottom of the pocket opening with a few extra stitches. I also sewed a short vertical line (along the side seam) from the top of the pocket opening to then reduce the length of the opening to 16cm. To ensure the pocket always sits to the front, I basted the pocket to the front skirt at the waist within the seam allowance.

I snipped the side seam allowance just under the pocket opening so the seam allowance could be pressed to the back whilst the pocket sits to the front. I snipped it at an angle so it was within the interfaced area to reduce fraying. However I don't think it would have been much of an issue to have pressed the whole seam allowance forwards instead.

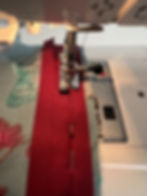
I thought it might be a bit bulky to bind the seam allowance of the pocket and so overlocked this instead. This was done after the dress was finished as I was sewing this dress away from home and hadn't brought my overlocker.
Sleeves
After sewing the bodice, I tried it on to assess the sleeve length. I liked the longer length and so overlocked the raw edge and turned it up by 1cm, without the additional 2.5cm. I used a catchstitch to secure this in place.

Looking closely in the photo above, you can see that there are a couple of runs in the fabric where the catchstitch pulled on one of the warp threads. This happened quite a lot when slipstitching the edge of the binding in place at the hem and the skirt wrap edge. I was entertaining the idea of slipstitching the edge of the front facing down to secure it further, but decided against it due to this reason.

Tie belt opening

While the surrounding area of the tie belt opening looked fairly neat, the seam allowances in the middle looked a bit of mess so needed some tidying up. I ended up handstitching over the edge to help contain the messiness and reinforce it with the tension it may be under.

Summary
The fact that I wore this dress on the two consecutive birthdays that followed its completion, shows how much I love it, and one of those was my 50th :)


What I love
It is a beautiful wrap dress, and has a lovely amount of swish in a drapey fabric. It would look amazing in silk for a formal occasion.
I like the slightly raised hem at the front which prevents it looking too straight across.
It has a great silhouette which I find really flattering.
It has great coverage, I didn't feel I was revealing too much.

What I would change
Having seen how beautiful the insides looked with the burgundy binding, I think it would have looked great to have this on the outer of the dress too, as a way of 'containing the print' as Sarah Veblen would say.
Having tinkered with a neckline before and done some basic drafting, I would consider widening the neckline slightly and curving the wrap front more, only because I feel this kind of neckline looks more flattering on me.
Having seen this post on Closet Core's website about a detachable skirt, I was drawn towards the different coordinating fabrics used, which is something I'd consider on a future version.

What I discovered
I didn't think wrap dresses were for me as I hadn't yet found a RTW one that I thought fit me well or looked good on me. Either the neckline was too low or high, or there was way too much room for my bust, or I was nervous of the lack of overlap of the skirt. The ability to adjust these on a me made garment really is our superpower :)
Find me on Instagram, Facebook, YouTube, Bloglovin' or scroll to the bottom to subscribe to my newsletter which is published every month.
Links
I have no affiliations, I'm just a keen buyer and user. A UK supplier may be linked, please try to source items from your favourite independent stores.


