
Increasing skirt wrap coverage on the Elodie Dress
- MingMakes

- Mar 19
- 3 min read
Updated: Apr 13

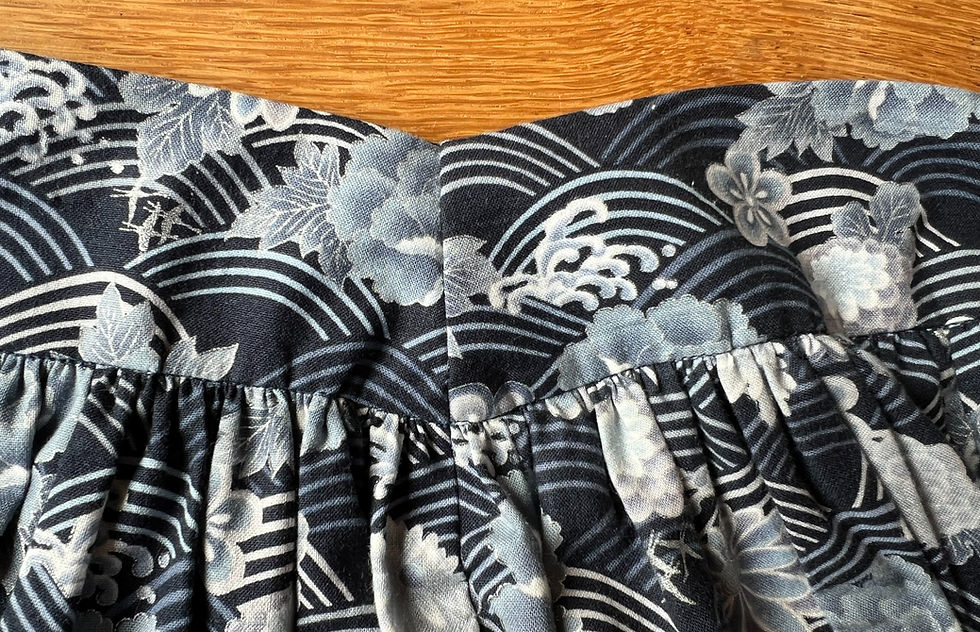
I was happy with the bodice coverage on the Elodie Dress by Closet Core Patterns, but wanted to increase that of the skirt. The original pattern has the right bodice overlapping the left side, and both stop short of the side seam. I think this looks great, as the edge of the front piece and the tie belt create good visual interest here. However I wanted to increase the underlap of the skirt, so that the left side of the skirt reaches all the way to the right side seam, leaving the look of the front unchanged. The video below shows the final result.
I made various fitting adjustments prior to this which can be seen on a separate blog post here. My full review of the pattern itself can be viewed here.

Closet Core resources
Closet Core have published a helpful blog post on Fitting Adjustments for the Elodie Wrap Dress. As seen in my fitting post, I didn't follow their entire method but it was a great basis on which to start. I detail my steps below for increasing the underlap of the skirt, which also required adjustments to the bodice.
Bodice adjustments
Measured length from centre front of bodice to side seam
I measured the length of the seam at the waist on the front bodice from the side seam to the centre front notch, not including the pleats. For me this was 22 cm. I used the similar technique of walking the ruler as for truing a seam.

Added this length to the left bodice piece
I added paper to the bodice piece, extending it so that it measured 22cm from the centre front, then adding the seam allowance of where the facing would attach. I kept the original markings which would be where the right side of the bodice would be cut. The extended edge would be where I cut the mirrored left side of the bodice.

I blended this line differently to how they suggested in their diagram as shown below. Their method gradually curves the wrap edge over the entire length.

Since only the left side of the bodice would need to be adjusted, the method suggested by Closet Core would mean a slightly different wrap curve on the left and right side. I therefore only extended it below the visible area of the wrap.

Made a new facing pattern piece
Since the shape of the left bodice had now changed, I would need to draft a new front facing pattern piece for the left side only. This was relatively straightforward to do as it would follow the line of the new bodice shape. I made a note to cut this piece right side up on the fabric, and wrong side up on the interfacing. (Believe me, this took way more time to figure out than it should!)

To reduce confusion the next time round, I cut a separate piece for the right side facing and marked it in the same way just to make it really clear.

Skirt adjustments
As mentioned in my fitting post, I needed to adjust the width of both front skirt pieces to account for the reduced pleats on the bodice. After making the adjustment above to increase the skirt wrap coverage, I also needed to adjust the left front skirt piece only so that it reached the right side seam at the waist.

I did this by placing the skirt pattern over the bodice, tracing the raw edge and extending to where the seam lines would meet. For even more accuracy, this should be done with the actual seamlines rather than raw edges.

I then drew a line parallel to the original size 6 all the way down the skirt.

This gave good coverage on the skirt.

The overall length of the back waist did not change and so the back skirt piece could remain as is.
Final thoughts
The belt ties attach to the waistband, and so after lengthening the left waistband to increase the underlap of the skirt, I realised once finished that this would mean one of the belt ties appears longer. When I wear the dress, I tie the longer piece in a half bow, but will make a change to the pattern piece for next time.

To read my full review of the pattern, click here.
Find me on Instagram, Facebook, YouTube, Bloglovin' or scroll to the bottom to subscribe to my monthly newsletter.
Links
I have no affiliations, I'm just a keen buyer and user. A UK supplier may be linked, please try to source items from your favourite independent stores.


Comments