


Avid Seamstress City Trousers review


Having thoroughly enjoyed two retreats with Lisa Falconer of The Avid Seamstress, deciding to go a third time was hardly a difficult decision. They have all been at different venues, but the same wonderful formula remains the same - time for relaxed sewing, expert help and guidance, delicious food, a massage, comfortable accommodation and a wonderful group of people to share it with. This was possibly my favourite of all, but then again the most recent generally is, like my garments :)

This time we were at The Farm at Avebury, conveniently less than an hour's travel for me. The accommodation and setting was beautiful, with home-cooked food for lunches and dinners, and a special cooked breakfast.
I was keen to make the City Trousers to add more bottoms to my wardrobe. I made The Culottes at the last retreat and have been pleasantly surprised how much I wear them. I pretty much just alternate between those and my Ginger Jeans, so I felt another pair of trousers would be welcome.
They are slim-fitting with an invisible zip at centre back, the same as the Culottes. I remember wondering whether this would feel uncomfortable, but you don't notice it at all and it's easy to do up. There are curved front pockets and back waist darts, with an optional split at the hem.
Fit
To make the toile, I folded the pocket piece along the fold line and attached it to the front piece with washi tape so it could be removed again later for construction, but would give me the correct dimensions of the front without having to make up the pocket. I made a toile prior to the retreat in size 2 (UK size10) but found this to be too tight around my waist and tummy. Once at the retreat, I was able to try on a sample in size 3 (UK size 12) which fitted me much better. The main adjustment required was to straighten up the side seams around the hips which had too much curvature.

I made a second toile in shorts length which fitted nicely and so I proceeded with this. I kept the pocket piece taped to the front for these adjustments.
When sewing the side seams, I only did this up to the base of the pockets so we could check the fit again around my tummy and hips. At this point the zip at centre back was not yet sewn, so I pinned this along the seam line. The fit was good, but just needed to be a touch tighter around the waist. Lisa recommended taking a 1cm wedge out of centre front at the waist to curve over my tummy, and blending back to the original seam about 5cm down. I adjusted the waistband piece accordingly, taking 1cm off each end.

This is how it looked once sewn and seam pressed open.

The length of the trousers was just right on me without any adjustments.
Fabric
Having made an error in ordering too little fabric last minute, I browsed the wonderful choice Lisa had brought to the retreat. I was particularly taken with a deep indigo cotton from Sevenberry, with fine white lines running down it. It is on the lighter weight side but perfectly good for trousers.

I asked Lisa about interfacing the waistband but she didn't feel it was required. Although this makes it very comfortable around the waist, it does tend to crease a lot with wear and so I would consider interfacing at least the inside of the waistband on a future version if using a similar weight fabric.

Construction
Overlocking
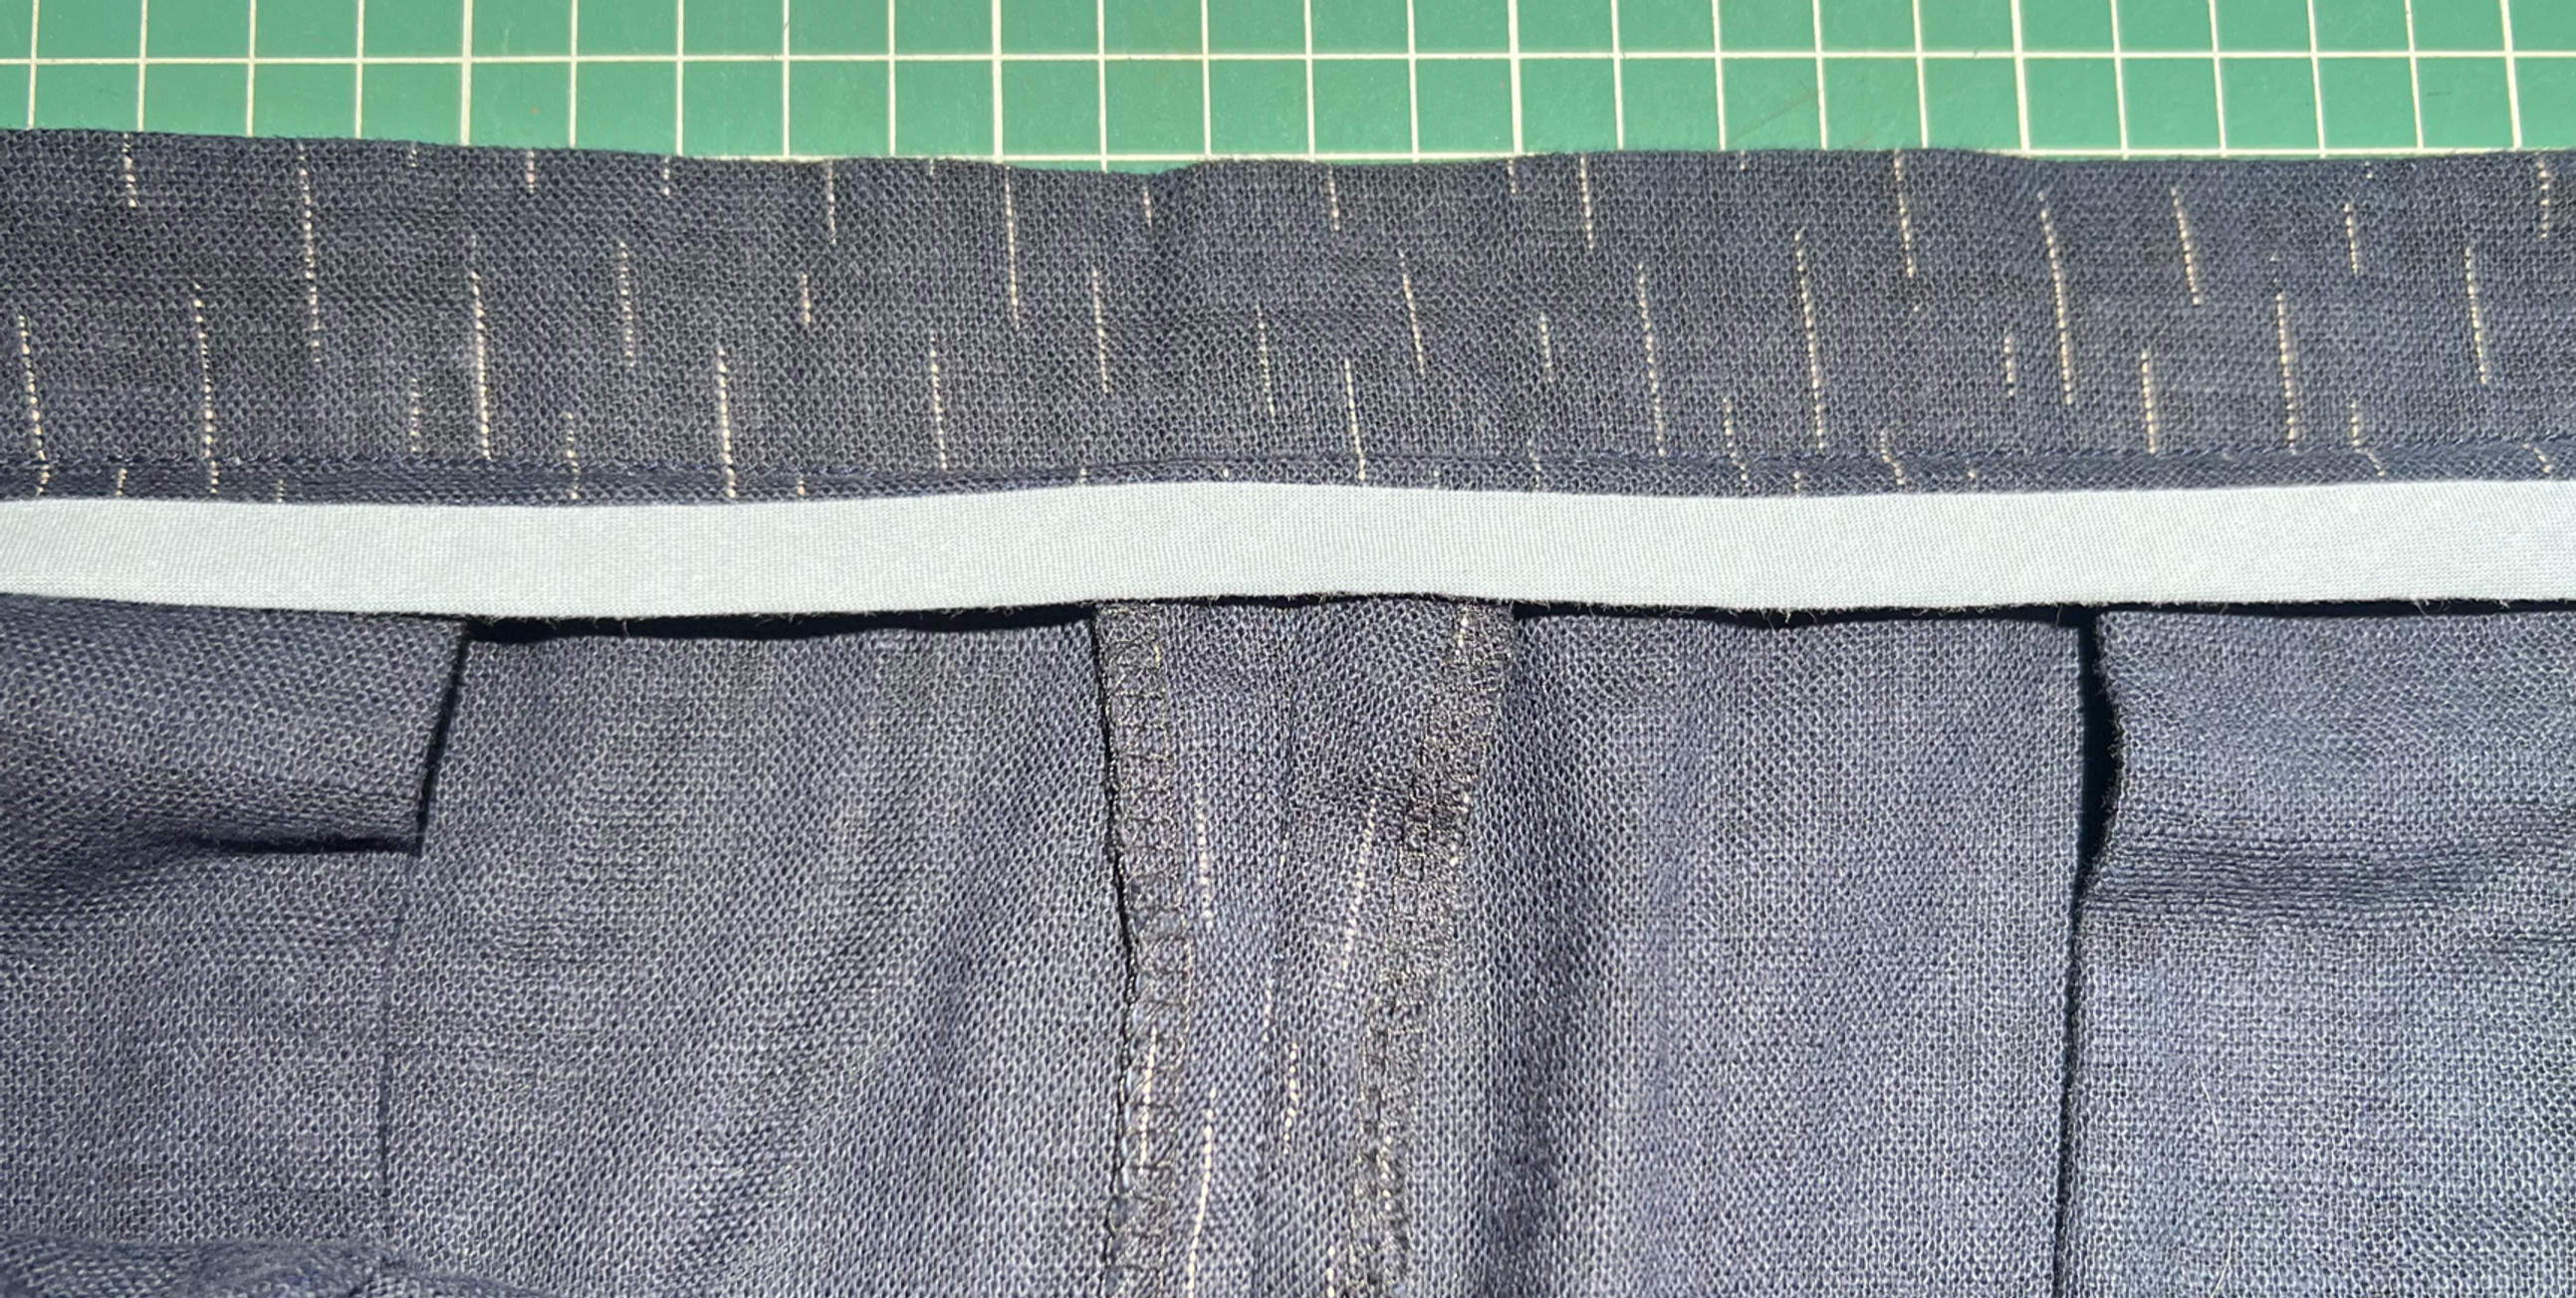
The instructions guide you to interface all the raw edges prior to construction, apart from the upper edge of the main pieces and upper edge of the pockets. An additional tip from Lisa was to consider how I wanted to finish the inside of the waistband at this stage. If I simply wanted it overlocked, then I would overlock the waistband piece at this point. However, if I wanted the edge either folded under or finished with binding (my preferred option), then I would leave it as a raw edge for now. I describe how I applied Hong Kong binding in the Waistband section below.
Pockets
The instructions mention the option to understitch the pocket edge and topstitch. I did both to keep everything neat and tidy.

Front and back crotch
The instructions guide you to clip into the crotch curves and press open the seam allowance, but Lisa was concerned this might weaken the seam so advised me to skip this stage. I wondered if this would create an issue with the bulk of the seam allowance but it was absolutely fine.
Side seams / side slit
This required some precision measuring and marking for a neat even result so I took my time with this. I sewed down the side seams heading towards the notch, but at this point, the edge of the fabric has curved outwards and the seam allowance is no longer 1.5cm. I therefore stopped short of the notch, where the seam allowance was still 1.5cm.
The pressed line that was done in step 9 to mark the seam line got a bit lost and so I re-pressed it and then drew the stitching line along the fold on the wrong side of the fabric. This was a little tricky having already sewn the hem in step 9, so I made a note to mark this line straight after pressing it when making this again.

After turning out the corners of the side slits, I checked whether both sides matched up. On one side they were off by a few millimetres, so I re-pressed the longer side to match the other. I could have re-sewn it but I felt that pressing it in place with it turned out would be a more accurate way of checking they were both level. It would be secured in this position when sewing the hem.

Hem
I used a catchstitch to sew the hem so it wouldn't be visible on the outside. I also secured the flap of the side slit within the depth of the hem.


Invisible zip
Having had many a zip go awry in my hands before, I basted it in place with a diagonal stitch to help secure it. I have sometimes used Prym Wonder Tape before for even more security, sticking it to the edge of the tape so it could still be removed after sewing the zip in place. However I didn't have this on me so continued with the basting, making the stitches closer together at the top of the zip where the positioning was more crucial.

In steps 22 and 23 to sew the zip into place, you are guided to sew down one side of the zip from the top down, then from the bottom of the zip up towards the top for the other side. Since the placement of the zip top was something I wanted to remain accurate, I sewed both sides from the top down.

Making and repairing a hole
On first go I inserted my invisible zip beautifully. However, it was in the wrong place. I had matched the top of the zip to the seam between the trousers and the waistband, rather than the fold which would form the top of the waistband. There is a very clear diagram and explanation in the instructions, but it seems that I chose to ignore it.
I unpicked the zip, but the combination of all the backstitching and matching thread made this difficult. Unfortunately I accidentally cut part of the fabric instead and made a small hole along the seam line.

Thankfully, tutor Amanda was on hand to advise me on fixing it. Here is what I did:
Fused two small squares of interfacing on the wrong side of the fabric over the hole.

Here is how it looked from the right side.

Stitched over the hole to reinforce the interfacing in this area, seen from the right and wrong sides below.
Stitched the seam. Since my hole was right over the seam line, my reinforcing stitches might show if sewing this back in the same way. Amanda recommended staggering the seam allowances, so that the piece with the hole had a larger seam allowance to conceal this stitching, and the other had a smaller one to compensate, so the fit did not change. This worked well, and I couldn't see the stitching from the right side.
Waistband
Hong Kong binding
I hadn't brought any binding with me but a generous fellow attendee Rosemary gave me some from her stash. I sewed it onto the inner waistband edge right sides together, matching raw edges together and sewing along the fold. I then pressed the binding around the raw edge and pinned it in place, making sure I would catch the binding round the back when sewing in the ditch.
I sewed this in place from the right side which was made a lot easier with the stitch in the ditch foot. Since I didn't want the navy thread showing on the light blue binding, I moved the needle to the left by 0.2mm just to make sure. This is a wonderful feature of my machine to be able to move it by such small increments. This meant I could sew at a faster speed than I normally would to ensure this result.

During wear, there was a tendency for the bound edge to flip up as shown in the photo below.
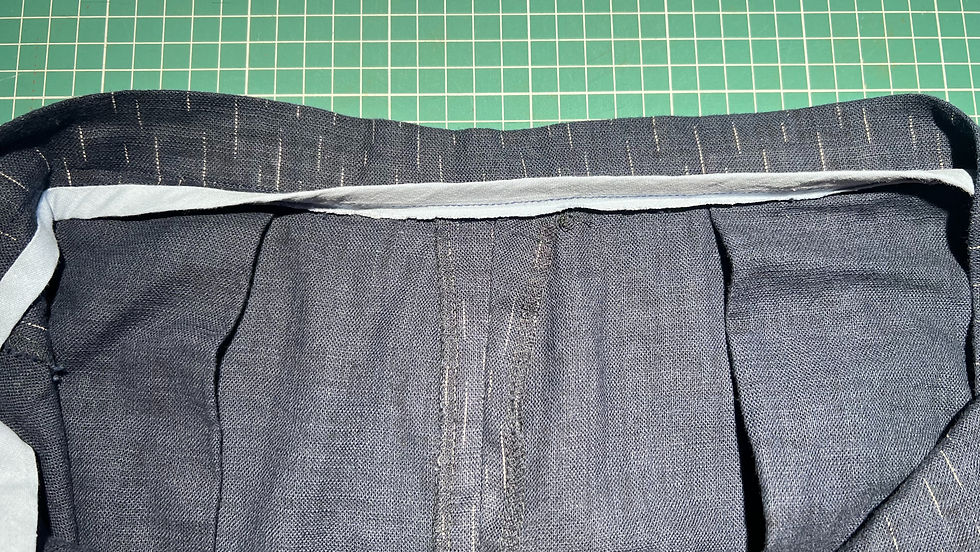
I decided to sew a few handstitches to secure this to the seam allowances down centre front and both side seams, similar to how you would secure a facing to the shoulder seam. I did it on both sides of the seam allowance for added security. This worked well in keeping the bound edge in place.

Summary
These are my best fitting trousers to date and therefore so comfortable. I wore them 5 times in the week after I'd made them.

What I love
They fit me really well and I can move comfortably in them.
The navy blue fabric is very me, with the fines white lines providing a nice bit of interest but without looking too patterned so it can still be worn with a busy print on the top.
I like the zip at centre back which avoids a bulky fly at the front over the tummy.
The slim fit of the trousers looks smart in this fabric and makes them suitable for many occasions.
The side slit is a nice detail, and of course the pockets are very welcome.
As always, the instructions and photos from The Avid Seamstress patterns are very clear and emphasise precision for the best result.

What I would change
I would consider interfacing the waistband if using a similar weight fabric again.
Other than that, I don't think there's anything else I'd change and I would love to make this again in more heavy weight fabrics for autumn/winter such as needlecord, moleskin or cotton twill.
What I discovered
This just reinforces for me that the fit is definitely the priority above the style and fabric. A well-fitting garment makes all the difference in the comfort of wearing it.
A sewing retreat like this offers a wonderful atmosphere that enabled me to truly enjoy the experience, all of which contributed to the quality of the final result.
An invisible zip at centre back is a neat style of closure, easy to sew and to do up.
Since these fit me so well, I could use them as a base to design other styles such as wide-legged trousers.
Find me on Instagram, Facebook, YouTube, Bloglovin' or scroll to the bottom to subscribe to my newsletter which is published every month.
Links
I have no affiliations, I'm just a keen buyer and user. A UK supplier may be linked, please try to source items from your favourite independent stores.


Comments