


Simplicity 8014 Denim Shirt Dress - Part 1: Design


In this post, I explain my process to adapt my bodice block to a commercial pattern, in this case Simplicity 8014. I hope that the explanation of my thought process and steps will help anyone wishing to use an already well-fitting bodice pattern to create another garment, either from an existing pattern or to hack it or even design their own.
Below is my wearable toile of my bodice block, and I used this for the basis of the dress since this already fit me well. It has two bust darts and two back waist darts.

This project was completed with a huge amount of help and guidance from Sarah Veblen on her mentorship programme. In this post I switch between metric and imperial measurements. This was largely because I tend to work in metric, and Sarah works in imperial so when she is giving me guidance about how much to make an adjustment for, it was easier for me to stick to her advice rather than converting.
Parts 2 and 3 of this series will be released shortly, providing details of my toile and garment construction.
Pattern
The pattern was Simplicity 8014 and I chose to make view D which is the denim dress in the main photo.

Several things drew me to this pattern as the one to start learning these techniques on:
The top of the dress was a button-up darted bodice, similar enough to my bodice block
The relatively simple design felt enough of a challenge without becoming overwhelming
I had been slightly obsessed with denim dresses recently and really wanted to sew one
I loved the shirt-tail hem
I do love a bit of topstitching and was itching to do some with my new sewing machine
Back bodice
According to the pattern's measurements, I was size 12 (second largest in the photo below). I lay the Simplicity pattern over my bodice block to get an idea of how they compared. There would be additional width on the original pattern to create the gathering at the yoke.

My own block was more narrow as expected with the additional gathering and ease of the dress. My own block also had fisheye darts at the back waist which I wouldn't sew, so this would create additional ease.
Having read a few reviews on Patternreview.com, some mentioned they would reduce the amount of gathering at the back, so I was mindful of this when deciding how much width to add.
Yoke
My own block has neck darts and I kept these on the yoke to maintain the shaping at the back. I then had to decide on the position of the yoke seams, where it meets the front and back pieces.
I used some washi tape on a previous toile to experiment with the placement of the seams (seen in orange in the photos below), making it curve slightly down towards the armholes on the back, similar to the original.
Testing with half-scale pattern pieces
Sarah suggested testing the gathering on half-scale pattern pieces, both for the pattern work and to get an idea of the relative amount of volume it would create. I lay my front and back bodices pieces on the floor, took a photo from above and printed them out on an A4 sheet of paper.

This created a 0.42 scale pattern piece. I extended the piece down, scaled to the original length of the pattern, multiplying the original length by 0.42 to obtain the length for my scaled piece.
Gathering
To create the gathering, Sarah recommended adding an even amount all the way down centre back, as well as a slash-and-spread adjustment hinging at the bottom hem.
I therefore added the equivalent of 1/2" at full scale to the width at centre back, giving 1" in total as it would be cut on the fold. This meant a 0.5" x 0.42 = 0.21" addition to the scaled pattern piece. This addition would only be needed up to the yoke seam, but for ease I made this addition all the way up to the neck for now.

I then copied the approximate position of the yoke from my toile with washi tape.

I wanted the gathering to start over the shoulder blade to fully cover the hollow in the centre of the back, again marking this approximately from the photo of my toile. I then drew two vertical lines for where I wanted to slash-and-spread.

I cut this piece at the yoke seam, then slash-and-spread the equivalent of 1/4" on the full scale pattern at each of the two lines. In total this means there is an additional 2" on the yoke seam for gathering:
0.5" at centre back, plus
2 x 0.25" slash and spread
Multiply this by two as it is cut on the fold = 2"

The piece left over at the top of the bodice was the yoke. I cut off the amount already added at centre back for the gathering of the main back piece, and just for the purposes of assembling this half scale pattern I added 1cm of seam allowance so the back bodice piece could be pinned or sewn to it.

Here are my cut fabric pieces from the half scale pattern.

I sewed a line of gathering stitches and pinned this to the yoke.

I was happy with the amount of gathering this created.

I wanted to see if this gathering looked appropriate against the gathering at the waist when worn with the belt. I put on my wearable toile, placed a measuring tape around my back as if it were the belt, and then measured the approximate distance between the side seams. I tied a piece of thread to replicate this length of belt as scaled on the mini version, ie multiplied by 0.42. I was quite happy with this, and so proceeded to make the changes to my pattern pieces.

Making back piece full length
After comparing the length of my own pattern to the Simplicity one, I wanted to add an extra 8cm to the length of the dress, so that it would fall closer to the knee. I added 8cm in length around the hip where my own bodice pattern ended, then blended to the original pattern down to the hem. This meant the hem facing pieces from the original pattern could still be used.
I then cut across the yoke seam to separate these pieces and added a seam allowance to both. In the photo below of this stage, the back piece is wider than the yoke as the additional 1/2" for gathering has been added to the centre back.

Making pattern changes for the gathering
Now I wanted to determine where along the yoke the gathering would start, as Sarah advised it can look good for gathering to start over the shoulder blades. I marked on my bodice block muslin where I wanted the gathering to start. It reached my shoulder blades so I was happy to go ahead with this for my toile.

In the same way as on the half scale pattern, I made the slash and spread adjustment for the gathering, indicated by the dotted lines.

Front bodice
Here is my own bodice block front bodice laid underneath the Simplicity pattern piece with the centre fronts and bottom of the armhole seams lined up. It was fairly similar, but my own bust dart was lower. I kept with the position of my own dart as I knew this was right for me.

Front yoke seam
I transferred this from the position marked with washi tape on my muslin as seen here.
Neckline
I kept the neckline fairly similar to my muslin, but dropping it at centre front by 1.5cm and then widening it slightly as it curves around my collarbones.
To create a smooth transition to the back neckline, I folded the shoulder seam allowance on the back yoke piece, lay this on the shoulder seam of the front bodice piece and continued the line with a curved ruler, blending into the original back neckline.

I made the front full length similar to the process for the back, adding 8cm in length and blending to the original line so I could keep the same front facing piece at the hem.
Truing side seams
I then trued the side seams of the front and back pieces to check they were the same length. I discovered that the back piece was 2cm longer than the front. I realised that I had lined up the front piece against the original by matching the underarm seams. However I hadn't accounted for the bust dart, where my own had a larger intake than that of the Simplicity pattern, creating the shortfall of 2cm. I added this length at the hip, and trued the seams again which were now the same.
Placket
I played with some widths of placket against my Avid Seamstress Blouse, the original Simplicity pattern being 3cm wide. I decided that 2cm (as shown in the photo below) looked more in proportion to my frame, and so I adjusted my pattern piece accordingly.

Collar stand / neck band
Looking at my Avid Seamstress Blouse, I liked the height of the mandarin collar (2.5cm) which would effectively be like the collar stand on this dress. I traced off the Simplicity neck band piece as a starting point. (The Simplicity instructions call this piece the neck band but it can also be called a collar stand so they are interchangeable for the purposes of this post.)
I walked the neck band seam round the back and front neckline so I could mark the current shoulder seam (which would be removed once I had made the yoke piece), the front yoke seam and centre front, keeping notches and markings as they were for now.

I placed the neck band over the bodice where it would attach, so the centre fronts and neckline seams lined up. Once sewn, the neck band needed to finish where the front edge of the bodice was folded over (the edge of the placket), and then I needed to add the 1cm seam allowance.

This wasn't far off the original pattern so I made the adjustment and blended it in. I then ensured I had a seam allowance all round of 1cm as in the original pattern.

I basted this in place onto my muslin. It looked pretty good but stuck out a little at the back.
After showing this to Sarah, she suggested either taking a small wedge out at the back to make it sit closer in there, or to open out a wedge towards the front to make this sit further out. I liked the idea of the latter to give a little more space around the neck which would look more flattering.
I opened out two wedges of 1/8" each - at the level of the front yoke and 1/8' forwards of this.

This looked much better and felt more comfortable (before and after views below). I did note that there appeared to be some pulling of fabric between the neckline and bottom of the front armholes. I realised this was because I hadn't trued the seam again after opening out the wedges, so the neck band seam was shorter than that of the bodice neckline.
Before open wedge adjustment After open wedge adjustment
Curved front placket
As I started to think about the collar, a lot of questions came to mind:
Should it meet at centre front? If so, it wouldn't sit on the neck band comfortably as it has started to curve down by this point.
Should the collar start at the placket / bodice junction instead?
Would it look better to change the shape of the neck band and have a more gentle curve starting further back?
Do I need to allow more space on the neck band for a button and buttonhole at centre front?
Does any of this matter if I'm never going to wear it done up at the top?
After some very helpful email discussions with Sarah, I took to her idea of curving the placket slightly outwards at the top, and not include any buttons further up than where I chose to place my 'top' button, since they would be non-functional anyway. I was relieved this meant not having to battle with a buttonhole through all that fabric on the neck band. This arrangement would help the collar fall open at the top, and more comfortably accommodate the collar and stand.
Since the placket was now curved, this would require a facing rather than the folded placket as in the original design, but this was an advantage as I could use a more lightweight fabric for the facing and create less bulk here.

My first task was to decide where the top button would be, where the collar would fall open from. This would determine where I was starting to curve the placket.
On my muslin I used pins to determine the position of the top button and marked this on my front bodice paper pattern. I drew a curved line on what was the fold line for the facing, starting about 1/8" above this, up to the neckline.

I cut along this line, the two pieces then forming the front bodice and facing pieces, then added seam allowances and trued the seams. I decided to add an additional 2mm to the bodice piece to allow for turn of cloth since the denim would be reasonably thick, and I wouldn't want the seam with the facing to show at the front.

I made the facing piece 5.8cm wide which was made up of:
2cm width of the placket
1.5cm seam allowance where it would attach to the front bodice
12mm for finishing the edge of the facing with the 6mm rolled hem foot, creating a double fold 6mm wide. (I later decided to apply Hong Kong binding along this raw edge instead).
6mm added so that the topstitching on the placket does not go through the rolled hem edge
5mm leeway to ensure the above
The original design has the placket made up of denim folded over twice creating 3 layers of fabric - the front, the back, and another layer folded under to enclose the raw edge. I considered doing the same with the facing, having it folded under once. However this would still be 3 layers of fabric (one of denim and two of the facing fabric) and I wanted to avoid bulk, particularly when sewing the buttonholes so I left the facing as a single layer.
After truing the seams, I changed the shape of the top edge of the facing. This was to avoid any unnecessary bulk once the collar stand was attached, but still ensuring the entire edge of the facing sat concealed within it.

Collar stand / neck band part 2
This curving of the front placket then required further adjustment to the collar stand. I marked the new 'centre front' line which crossed the collar stand at more of an angle now.
Collar
It was now time to look at the collar. Having reduced the size of the collar stand, I thought it appropriate to do the same with the collar, so reduced the height by 2cm as a starting point and would see how this looked.
I reduced the length of the pattern piece to have it finish at the new centre front and marked two circles on both the collar and collar stand pieces to indicate this position.

I cut our a collar and sewed it to the neck band. Since my muslin was now different due to the curved placket I had just drafted, I simply held this up to my neck and was happy with the proportions.

Yoke
Having finalised the neckline I could now make the yoke pattern piece. I stacked the back yoke piece onto the front bodice, so that the shoulder seam lines overlapped.

After taping this in place, I cut across the front yoke line and added seam allowances to both pieces.

When constructing my toile, I had to make a note to still mark the original shoulder seam with a notch on the yoke piece, so I could match this up with the notch on my sleeve cap.
Sleeves
Knowing that my bodice block sleeves fit me well, I used these. It includes some gathering around the sleeve cap which I kept. If I wanted less gathering on a future version, I could create a two piece sleeve pattern. I did however want it gathered to a cuff, similar to what I did for my velvet Zadie jumpsuit, but with a 3/4 sleeve instead.

The cuff needed to be big enough so it wouldn't catch on my arm if bending it at the elbow, or have it stuck there and I'd have to pull it down again. The sleeves on my bodice block are fairly fitted and so I didn't want the cuff to be any narrower than this.
I had already made a 3/4 sleeve blouse with my bodice block but I wanted the sleeve a touch shorter than this.

After turning up the sleeve hem by 1.5cm, this looked about right. I initially did a slash and spread technique to add an additional 1.5cm width in three places to the sleeve hem (4.5cm altogether) but this didn't create enough gathering when seeing this on my toile.

I decided to use a more calculated approach by measuring the hem as it was now. This could be done by measuring the pattern piece but for demonstration I've done this on the actual sleeve. The sleeve was sewn, and this measured about 15cm across the width.

I then gathered the sleeve to achieve the look I wanted and measured this again. This came to 11cm across.

The difference between the two measurements was 4cm, which I then multiplied by 2 as this was the sleeve folded in half. This made a total of 8cm I needed to add. Since I was making the spread in 3 places, I made the maths easier by deciding to add 9cm which would divide into 3 more easily, as well as giving me some leeway in case the cuff felt a bit tight.
My bodice block sleeve bulges out slightly at the forearm, as my forearm is quite large compared to my wrist. With the gathering of this sleeve, the fit did not need to be so exact and so I straightened the underarm seam. I also made the hem straight again after the curve that the spread created.

I attached the right sleeve and experimented with cuff sizes by holding up strips of fabric of various widths. I roughly sewed my preferred one of 1.5cm and was happy with how this looked.
This required another pattern piece for the cuff which was a rectangle with the following dimensions:
Length: My chosen length of cuff 27cm + seam allowances (2 x 1.5cm) = 30cm
Width: My chosen width of cuff 1.5cm + seam allowances (2 x 1.5cm) = 4.5cm
Breast pockets
I looked at the size and position of the breast pockets, again making them smaller than the original. I decided to go for just the one to avoid the 'boom boom' effect of the bust as Sarah put it :) She also suggested making the pockets slightly narrower at the base and maybe adding a point, similar to a jeans back pocket. I liked the look of this and so adapted the pattern piece. I folded the piece along the fold line so I could accurately cut the shape of this flap (where indicated below), which would also now be angled.

Although the pocket was decorative and wouldn't be used, I decided to line it. This was to reduce some of the bulk, as there would be 3 layers of denim in some parts - the outer pocket, seam allowance and the folded under raw edge. This would mean swapping one layer of denim for two of the lining fabric, but it just seemed a neater result and I wouldn't need to worry about whether I caught the folded under raw edge in the topstitching. I used the technique taught by Lynda Maynard for my Sienna Maker Jacket as described in this post.
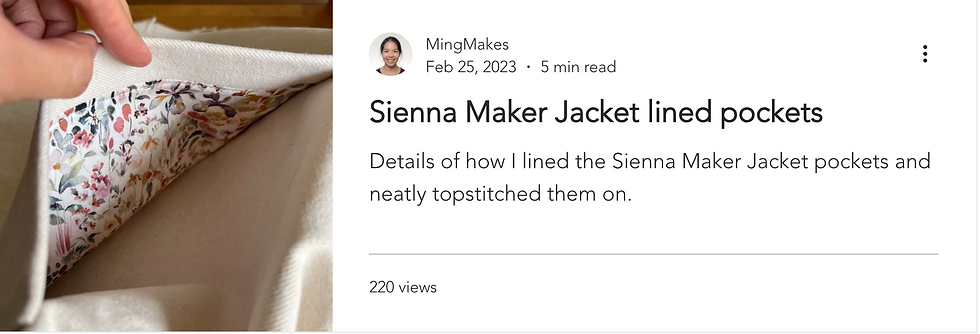
The lining is attached to the folded under denim with a 6mm / ¼" seam allowance. I made a separate pattern piece for the lining by tracing the pocket piece folded under and adding the 6mm / ¼" seam allowance at the top edge. I then cut the other 4 sides of the pocket 1-2mm smaller so that the lining wouldn't show on the outside.


Side seam pockets
I made these bigger because, well, why wouldn't you?

Look out for parts 2 and 3 of this series to be released shortly, about my toile and construction details.
Find me on Instagram, Facebook, YouTube, Bloglovin' or scroll to the bottom to subscribe to my newsletter which is published every month.
Links
I have no affiliations, I'm just a keen buyer and user. A UK supplier may be linked, please try to source items from your favourite independent stores.


Comments