
Frankie T-Shirt
- MingMakes

- Nov 20, 2021
- 5 min read
Updated: Sep 15, 2024
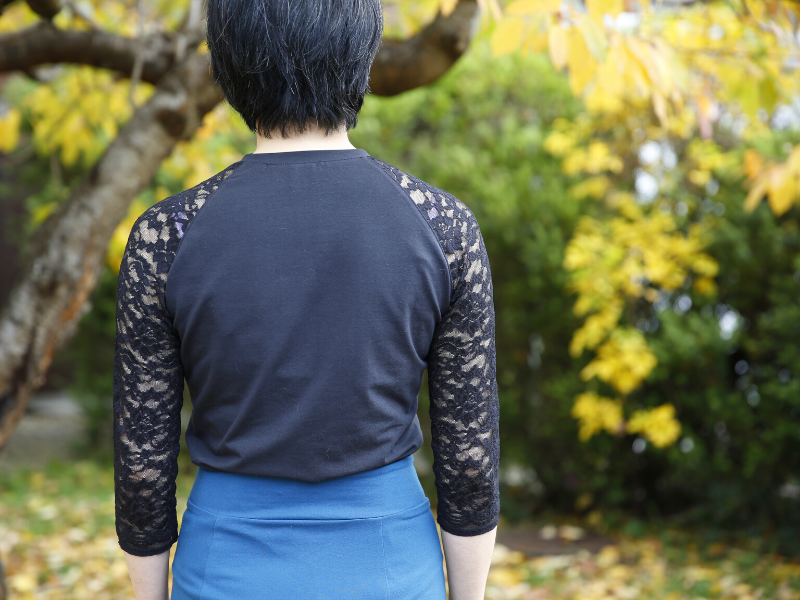
I'm working my way through Tilly Walnes' book Stretch! to learn more about sewing knits, having finished Love At First Stitch and enjoyed the format of learning through more involved patterns as the book goes on. I made the Bibi Skirt a little while ago, the first pattern in the book, and now return to the next, the Frankie T-shirt. Here are the two together, I think the stretch lace on both pairs them up nicely.

If you've seen the original pattern, I know this looks nothing like it. But I had a feeling I wouldn't wear the baseball top version that much, and essentially it is just a raglan sleeve knit top.

My original inspiration for the stretch lace sleeves came from Samantha of sammieseams on Instagram with this lovely top she made. This was more my style, and so I got to work on making some changes.

Fit
This is the first knit top I've made and so I wasn't quite sure what to expect from the fitting process. I generally need to make a lot of adjustments to woven bodices, as my upper bust measurement is similar to my full bust, along with a rounded back. I detailed my entire fitting process and changes I made to the pattern in this blog post, including photos of my toiles and how I almost eliminated the folds of fabric from the shoulder down the arms that are often an issue with raglan sleeves. The main change I made from the original style was to have it more fitted, in particular the sleeves.

Fabric
I used John Kaldor Cadiz Cotton Jersey Stretch Knit Fabric and John Kaldor Perugia Stretch Lace from Minerva. Since I was ordering online, I thought the easiest thing would be to match black jersey with black lace, but would happily have considered other colours. I cut the sleeves in a way that didn't require hemming, using the edge of the fabric instead to make use of the pretty pattern here.

Construction
Chainstitch
After getting a little tired of all the sewing and unpicking of my toiles, I remember reading somewhere about using a chainstitch for basting which can be removed very quickly. I’m fortunate to have a coverstitch machine and with a little research, found this post on sewingpatternreview.com featuring a very helpful video by SewLibra demonstrating how to unpick it. This will now definitely be my go-to stitch for toiles and basting.
I didn't want the raglan seams showing through the lace sleeves, so I pressed them towards the bodice and secured them with a chainstitch. I used the lightning stretch stitch to construct the rest of the top, but the chainstitch gives a lovely line of stitching that is still stretchy.

I also used chainstitch round the neckband to secure the seam towards the bodice. Even though this meant a small bit of seam showing round the raglan sleeve part of the neckline, pressing it the other way meant the neckband would have looked bulky. It gave the top a more uniform look with the stitching on the raglan sleeves, and I preferred the look of this to the zigzag suggested in the instructions. It took me 3 attempts at basting the neckline before it looked right and sat flat.


Overlocker
I finished all seams with a 3-thread overlock stitch. When sewing in the round for the neckline seam, I used a great technique described by Murni of experimental_sewist on Instagram for a really neat and controlled way of starting and ending an overlocked seam, instead of joining on and veering off. It involves pulling the needle threads forwards allowing you to insert your fabric under the presser foot almost like a normal sewing machine. Then as you come back to the start, disengage the knife and sew over a few of the beginning stitches to secure. Murni's post describes all the steps clearly with photos.

Stretch lace fabric
As I started to sew the underarm seam of the stretch lace sleeves, I had the classic situation of the fabric being pulled under the needle plate. Unfortunately I didn't notice immediately and ended up putting a good number of stitches into the same spot making an awful mess, requiring me to unscrew the needle plate to release it. I considered two options: just carry on and put up with a hard knobble at the end of the sleeve, or try to unpick it but risking ruining the lace in the process.
I went with the latter which took forever because it was hard to distinguish the black thread all knotted up in the black lace, but I finally got it untangled and was very pleasantly surprised to see the lace had still held its shape, because I certainly wasn't being that gentle by the end of it. I decided to experiment with some scraps before attempting that again.
I tried some tearaway stabiliser. This did the trick of preventing the lace from being pulled under, but after tearing it away and picking away as much as I could, it still left a faint white line at the seam as shown in the photo below.

I have often heard of using tissue paper so this was my next trial. I had to go a little more slowly to ensure the fabric didn't get pulled down, but it tore away easily with no residue and so I used this on my final sleeves.

For the sleeves and all the rest of the construction, I used the lightning stretch stitch with a walking foot.

Hemming
This was my first time sewing a curved hem and I wasn’t sure how to deal with the inevitable slight wrinkling of the fabric folded under on the inside of the curve, so I looked to Google for some guidance and found this great video by Melly Sews. She bastes a line of stitching where you want to fold the hemline, uses this line as a guide to pressing the hem, and reassures you that those wrinkles will be there but it doesn't matter because they don't show on the outside.

It worked really well for me, then I coverstitched the hem which made for a lovely finish.

I added a couple of double-sided labels from Porcupine Patterns to the front and back hem, which say HAND MADE on one side, and the same in Japanese on the other. I felt these small black labels with white writing were a nice detail but wouldn't stand out too much. I used the Sewline Fabric Glue Pen to hold them in position while stitching over them.

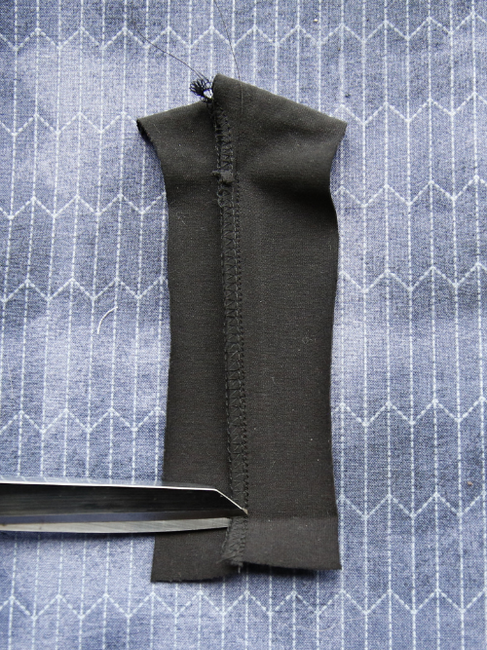
Not being very experienced with the coverstitch machine yet, I have noticed on previous projects that it doesn't handle bulky seams particularly well and tends to skip stitches over them. I therefore reduced bulk by snipping the side seam at the fold of the hem, flipping the seam one way under this fold and the other way above it, as demonstrated on scraps in the photos below. This gave me a great result first time.


Summary
This is a great top, and pretty versatile as either smart or casual depending on the fabric choice and fit. I love this version with stretch lace sleeves which I think look so elegant. The top was straightforward to sew and with minimal pattern pieces, and the instructions were detailed as the book is to help people learn how to sew knits. There's a good chance I'll sew up a version more like the original as a fitness warm up top.

Find me on Instagram, Facebook, YouTube, Bloglovin' or scroll to the bottom to subscribe to my monthly newsletter.
Links
I have no affiliations, I'm just a keen buyer and user. A UK supplier may be linked, please try to source items from your favourite independent stores.


Comments