
French seam a gathered ruffle without bulk
- MingMakes
- Sep 17, 2021
- 3 min read
Updated: Aug 18, 2022
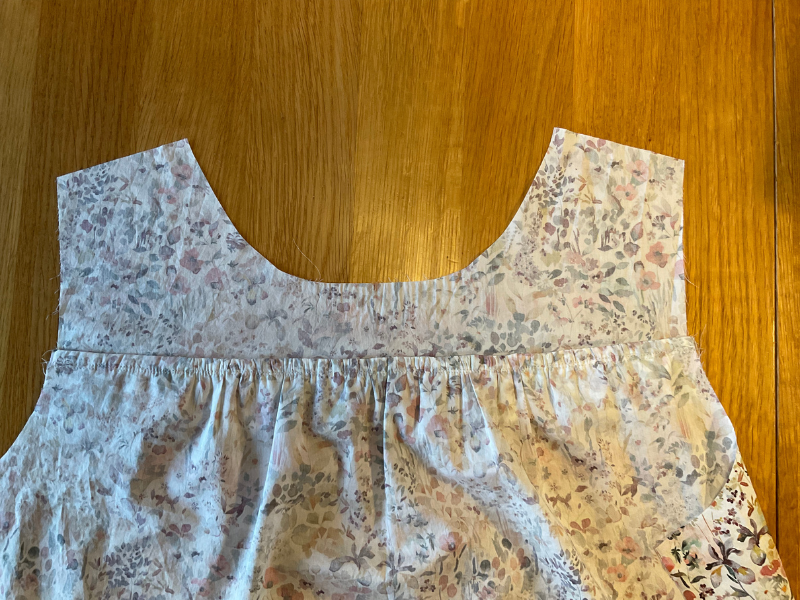
I used Liberty Tana Lawn Felda fabric for sewing the lovely Sagebrush Top by the Friday Pattern Company. My review of the finished top is here, along with a double-gauze gingham version here.
The print is so pretty and delicate, and the fabric soft and smooth. I bought this from the actual Liberty store in London, my first time visiting this fabric wonderland and I took hours choosing what to buy! Being a light-coloured fabric, it is very slightly sheer so I decided to use French seams all round, as well as it making the insides look really neat.

I would have overlocked the ruffle seam as suggested in the instructions as this would have been less bulky than a French seam but I made this top whilst away in Wales and didn’t pack the overlocker. I therefore tried a French seam by trimming the ruffle seam back and including only the front body and yoke pieces on the first pass, then to include the ruffle on the second pass. I'm really glad I did this as I think it's a nicer finish than an overlocked seam.
This technique will work with any ruffle seam, or where there are more than 2 pieces of fabric being joined e.g. with piping. Here's how I did it:
Step 1 - Trim the ruffle seam by 6mm
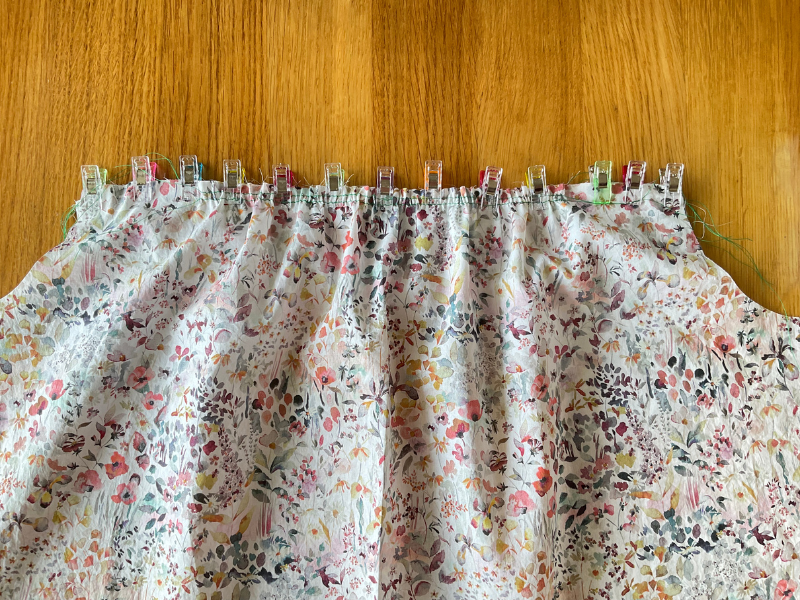
This is to be done after Step 7 of the instructions, having basted the ruffle to the front yoke as shown below.

Trim the seam of only the ruffle by 6mm, leaving that of the front yoke in tact. Having already put one of the lines of gathering stitches at 6mm from the raw edge, I just cut along this line.

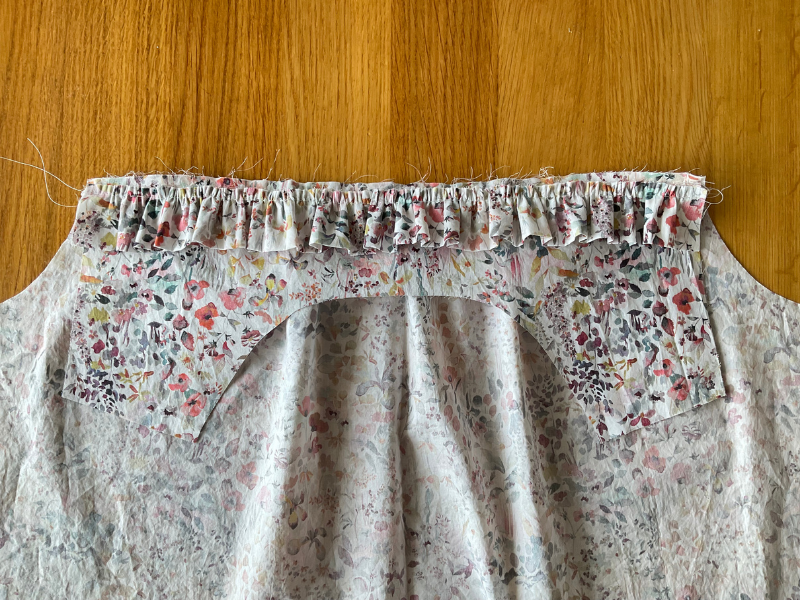
Here is the trimmed seam:

Step 2 - Pin front yoke to front body, wrong sides together
Pin the front yoke with ruffle to the front body (already gathered), wrong sides together.


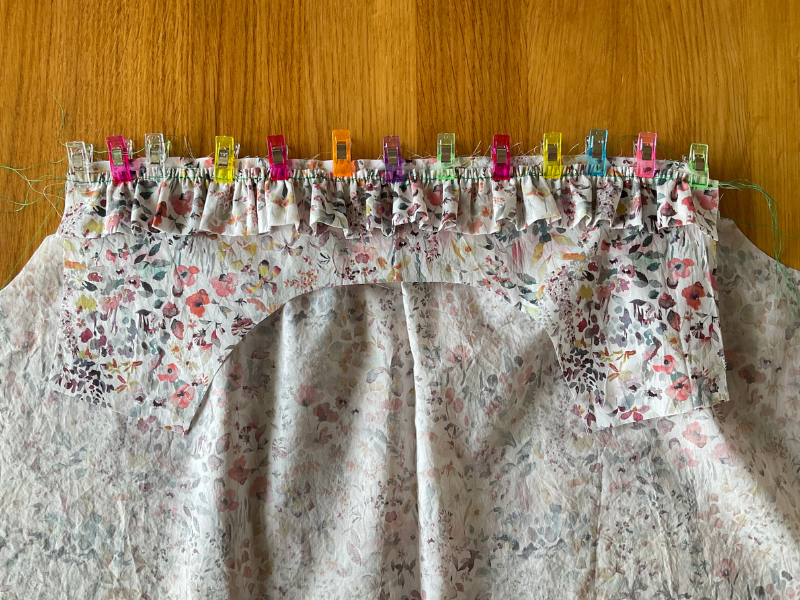
Step 3 - Sew together with 5mm seam allowance
Sew this seam together 5mm from the raw edge. You are trying to avoid catching the ruffle seam, but having already trimmed it, this shouldn't be a problem.


It's at this point that I'll share what I managed to do wrong:
Mistake 1 - I used a 4mm stitch length on this seam as I made the classic rookie mistake of not changing stitch length after basting. Thankfully this is the inside of the French seam so isn’t under tension like the outer seam.
Mistake 2 - You can see that I used green contrast thread for the gathering stitches and basting, with the intention of removing them afterwards. However, this was before I remembered about the French seams which means these stitches wouldn’t be exposed once the seam is sewn and therefore couldn’t be removed.
Solution - I therefore stitched another line of basting close to the contrast basting line with matching thread, so this could stay in place once the second pass for the French seam was done.
Mistake 3 - When sewing this new line of basting, I sewed through all 3 layers, the front yoke, ruffle and front body. This meant the seam couldn’t be opened in order to do the second pass for the French seam.
Solution - After unpicking, I sewed a new line of basting just through the front yoke and ruffle, and didn’t bother with the lighter gathering on the front body which was at least secured with the first pass of the French seam.
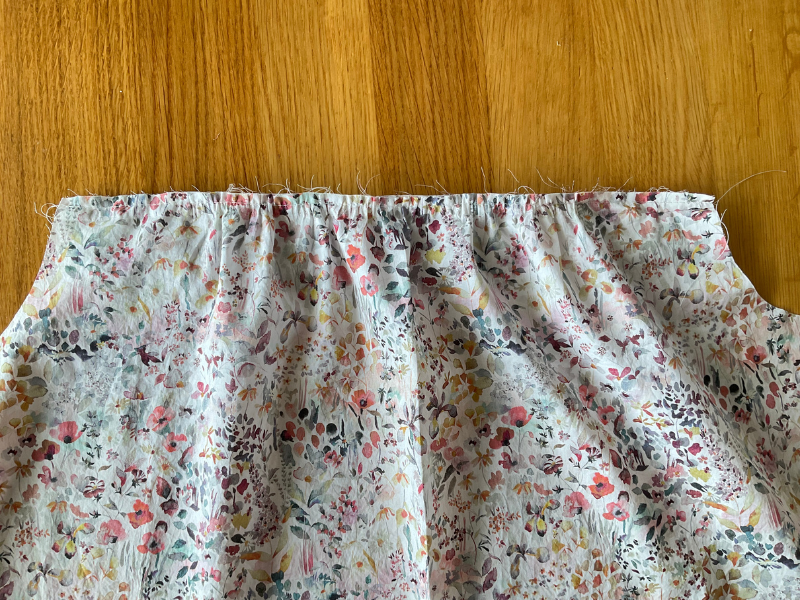
Step 4 - Put right sides and sew
Fold the pieces back on themselves so that the right sides are now together and sew the seam 1cm from the edge. This will enclose the ruffle seam, but since it has been trimmed, it isn’t so bulky by being folded over twice, and it’s a lovely neat finish.

Now continue with step 9 in the booklet to press this seam and topstitch.


Find me on Instagram, Facebook, YouTube, Bloglovin' or scroll to the bottom to subscribe to my newsletter which is published every month.
Links
I have no affiliations, I'm just a keen buyer and user. A UK supplier may be linked, please try to source items from your favourite independent stores.


