
Fitting the Sagebrush Top
- MingMakes

- Sep 15, 2021
- 4 min read
Updated: Sep 6, 2022
I feel like I’m the only one who’s done any significant fitting alterations to this pattern by the Friday Pattern Company - I’ve come to the conclusion I must be oddly shaped! It is loose fitting and so I didn’t find many examples where people had done much in the way of fitting this pattern other than widening or lengthening so thought I’d put together a post describing how I did this. My review on the pattern itself can be found here.
Although my fitting adjustments are specific to me, I hope others will find my process useful as the theory is the same across everyone and every pattern. I could have got away with fewer adjustments and been perfectly happy with the result as it is a loose-fitting top, but I wanted to practice fitting on this relatively easy garment.
For those after a little less volume on the sleeves, read this post about my second Sagebrush Top.

Choosing pattern size
My bust size is 85cm which falls between XS and S, and although the Sewalong advises sizing down if in between due to the generous ease, I went with S knowing that the upper bust is often tight for me in patterns and RTW clothing. In fact my upper bust measurement is about the same or slightly bigger than my full bust. Along with a rounded back, I think this is where most of my fitting issues arise.
Fitting the yokes
Size S was too narrow across the chest, and after comparing to a sloper I had made a while back, I needed another 8cm across the width of the front yoke and front body pieces (4cm to the pattern piece as it is cut on the fold) so added this centrally. This also meant adding 8cm to the ruffle. I adjusted the neckline to continue the curve around the front.
I added 2.5 cm across the width of the back yoke piece (5cm total) without redrawing the neckline as it is horizontal where I widened it centrally. Due to the now lengthened neckline, I added another 13cm to the neckline piece (8cm extra from front yoke + 5cm back yoke).
Here are the new pattern pieces for the yokes:

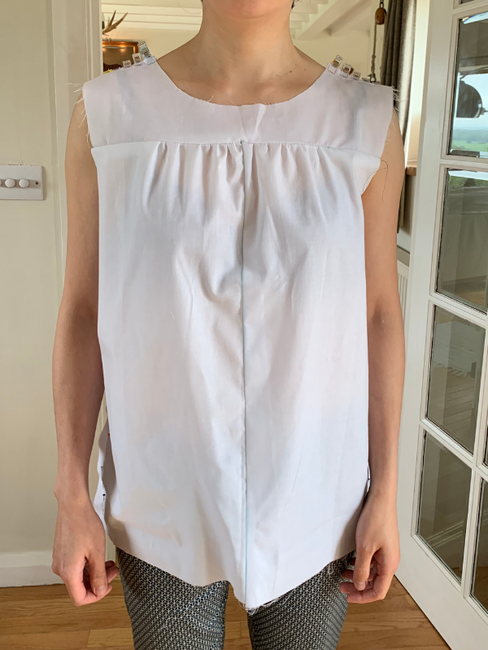
First toile
Here is my toile after the above adjustments. The shoulder and side seams are just pinned, and the seam allowance is still included around the armhole.


Things I wanted to correct in this toile were:
Give some more room for the right shoulder which is showing some drag lines in the back view
Give more room for my rounded back, which is causing the back yoke seam to curve down towards the armholes
Reduce some of the volume around the waist and hips
Reduce the excess at the front armholes where the front yoke meets the front body piece, as indicated by the arrows:

This is how I approached each issue.
1. More room for the right shoulder
I added 0.5cm evenly to the whole right shoulder seam on both the front and back yokes as shown here:

2. More room for the rounded back
I added 3cm in height between the yoke and back piece in a curve going to nothing at the armholes, by adding 1.5cm equally to both the back yoke and back body pieces. The curve was identical on both pieces which would make sewing this seam easy.
In the photo below, the back body piece has a lip hanging out to the left to indicate that I need to position this 2.5cm from the fold, as an alternative to adding a piece of paper all the way down this side 2.5cm from this edge. The back yoke is longer due to the folds done later to create the gap between the two pieces which the necktie brings together.

For the second toile in the photo below, I just pinned in a piece of fabric inserted for additional height. It wasn’t smooth due to the numerous pins but I was hoping it would be fine on the finished garment (which it was - phew!)
3. Reduce volume at the waist and hips
I graded the front piece back to the original size S at the hem, but keeping the additional 4cm on the pattern where it meets the yoke (+8cm in total as it is cut on the fold). In the photo of the second toile below, I did this by sewing a seam down the centre (almost like a long vertical dart) but on the actual pattern this had to be taken in on the side seams, as the front body is cut on the fold.
4. Reduce excess at front armholes
I reduced both the front yoke and front body piece by 0.5cm each at the armhole like a wedge, grading to nothing where the gathering of the front body stops.
Second toile


I was pretty happy with this result and so carried on making the garment. The only other change I made after that was to lengthen the sleeves by 12cm to make them more of a 3/4 length. If sewing this again I’d add an extra couple of cm as the elastic cuff just catches my elbow when bending the arm, something I didn’t notice with the toile as I didn’t add the elastic.
And here is the finished result which I absolutely adore:


Find me on Instagram, Facebook, YouTube, Bloglovin' or scroll to the bottom to subscribe to my newsletter which is published every month.
Links
I have no affiliations, I'm just a keen buyer and user. A UK supplier may be linked, please try to source items from your favourite independent stores.


Comments