
Stella Hoodie
- MingMakes

- Apr 9, 2022
- 7 min read
Updated: Mar 7, 2023
This is the fourth pattern in the Tilly and the Buttons book Stretch!, written to teach people how to sew with knits. It is paired with a jogging bottoms pattern which I will tackle at a later date. I was excited to sew up the hoodie as this is an item I don’t have enough of in my wardrobe. Here is my full review.

Fit
Since this is a loose-fitting garment, I was hopeful I wouldn’t need much in the way of adjustments. I very quickly realised this was a pipe dream and soldiered on with another epic fitting journey as documented in this post, with photos of all my toiles and details of the adjustments I made.

I had a similar issue when fitting my Freya dress where if I raised or hunched my shoulders, the fit at the back looked much better and so part of my journey on the Stella was figuring out how to correct this. This involved doing a sloping shoulder adjustment but only on one of the pieces.
Here are the before and after photos of the back:

See all my fitting details in the post here.
Fabric
I fancied trying some colour blocking or mixing prints having seen a few examples online. I really liked the look of this one from Shein:

However, being new to knits I’m not experienced at sewing together two fabrics with different properties, and what considerations are needed to help it retain its shape, avoid puckering etc. The next best thing was to use the same fabric in two different colours which I ordered from Guthrie&Ghani. I used the Cosy Colours Multi Fleck Fleece Sweatshirt Fabric in burgundy and dark grey. They contain multi-coloured flecks which are much more obvious on the burgundy fabric and beautifully subtle on the grey.
It’s also not too thick so I was confident my modest sewing machine could handle it. It is 95% cotton, 5% elastane with 30% two-way stretch, 240gsm.


Having read so much advice about not tumble drying sweatshirt fabric, I just knew that air drying it would be a hassle for me and so I put it through on a low temperature cycle. The book mentions that sweatshirt fabric can shrink a lot so I washed and dried it 3 times just to be sure.

Construction
Overlocker
About a week before I started making this hoodie, I attended a beginner’s overlocker workshop at Guthrie&Ghani. I have used my overlocker to finish seams but wasn't confident enough to sew a garment with it. This workshop went through the basics and then we made a simple t-shirt (see my newsletter here for photos and more details). This was so useful because it included sewing a neckband on without quartering and pinning, but by getting a feel for how much to stretch the fabric as you sew. I don’t think I would have tried this myself if I hadn’t been to the workshop.

I decided to use my hoodie as a way to practice my skills, knowing that any dodgy seams may not show very obviously. It did take a little courage to make this decision because there was a large part of me that knew I’d make it neater if I used the sewing machine, but I also wanted to gain experience with the overlocker for future garments.
Hood
The instructions describe sewing buttonholes for where the drawstrings enter/exit the front edge of the hood, but I was quite keen on the look of my niece’s Bristol Uni hoodie which has a large eyelet and a wide flat drawstring (20mm wide).

I therefore decided to put eyelets into my hoodie, using the Prym 14mm silver eyelets. I did a practice one which turned out really nicely. Moved onto the real ones, managed to do one inside out and the other had a funny lip on it like the inner collar had not bent over properly, shown in the section just underneath the curved white line in the photo below.

I decided to remove them and turned to the internet for advice on how. I used the method in this video by Lucy’s Corsetry at around 1:00.
I was feeling a little sorry for my fabric with all of this going on, so steamed it back into submission after removing the eyelets. Before redoing them, I had another practice go which went beautifully. Onto the real one - ugh! Funny lips on both of them. OK one more go - ugh! Again! Maybe my angle’s not right or something is slipping but by this time I had run out of eyelets so this was going to have to stay. It's not at all noticeable, and my back up plan should they fall out in the future is to try an embroidered eyelet.

When sewing together the hood and lining on the overlocker, I had to contend with the bulky seams. I had followed instructions to press the seam allowances to the centre of the hood which meant there were 6 layers of fabric altogether. I’m pretty sure it wouldn’t have mattered to press the hood seams one way and the lining seams the other to reduce bulk but for some reason I felt the urge to follow through with the original plan. This was a bit tricky on the overlocker, along with having the eyelet passing under the presser foot near the start and end. I tried the hump jumper which helped but I didn’t get a terribly neat result.

I pulled at the seam to make sure it was secure, and then left it as is. On the inside of the hood, I’d never see it again!

Since I chose large eyelets and wanted a wide braid, I stitched the channel for the braid 3cm wide instead of 2cm, using washi tape as a marker line at 3cm from the needle.

Drawstring
For the drawstring cord, again copying the look from the Bristol Uni hoodie, I ordered some 20mm wide burgundy shoelaces as I couldn’t find braid in the width I wanted. The colour didn’t quite match so I considered ordering it in white instead, or covering it in the burgundy sweatshirt fabric to make it really match. However, I did like the texture of the braid and so decided to go with the white shoelaces.

I cut off the ends and doubled them up, sewing the two shoelaces together along their edges to thicken the braid. To secure the raw edge where I cut off the ends, I folded them over 2.5cm, put the folded ends facing each other on each shoelace, sewing them together to enclose them. I secured the folded ends with a Sewline fabric glue pen before sewing.

I used my edge guide foot to sew in a straight line down the edge of the shoelaces. This has to be one of my favourite presser feet, it is so helpful for topstitching neatly.

To help secure the ends, I sewed a cross within a rectangle. I love the look of the finished result.

Kangaroo pocket
I decided to add the kangaroo pocket option. When looking at the photo in the book, the opening seemed a little tight and I wanted to be able to get my whole hand in easily.

I put my hand over the opening and it seemed tight after taking into account the seam allowances. I had already cut the pocket by this point so I angled the pocket openings adding an extra 3cm or so by cutting along the ruler in the photo below on each side (the pocket is upside down).

Here is the pocket with my hand laid over the opening on the before and after pieces.


This meant remarking the new pivot points for sewing the pocket and lining together, shown by the black dots.

Here is a photo of the pocket on the lining before that was cut to the same size to compare the shape.

I could have sewed the pocket and lining together on the overlocker but I thought the corners might be bulky when turning it out, so I used the sewing machine and clipped the corners as described in the book.
When sewing it on, I put a little bit of give in the pocket i.e. not flat on, so this would allow for hands or phone etc. to go in the pocket without pulling on the bodice piece so much. I remembered this from the Love At First Stitch book when it described adding a patch pocket onto the pyjama bottoms, creating space in the pocket by putting a hand in and pinning after that.

I used 2-needle coverstitching to secure the pocket to the bodice.

Sleeves
Sewing the sleeve cuffs on with the overlocker was a little fiddly as the circumference was small. I used the technique described in this SewEssential video at 1:57 for cutting a section of the seam allowance out to start sewing.

I then used this video by experimental_sewist on Instagram to start and end overlocking in the round neatly.

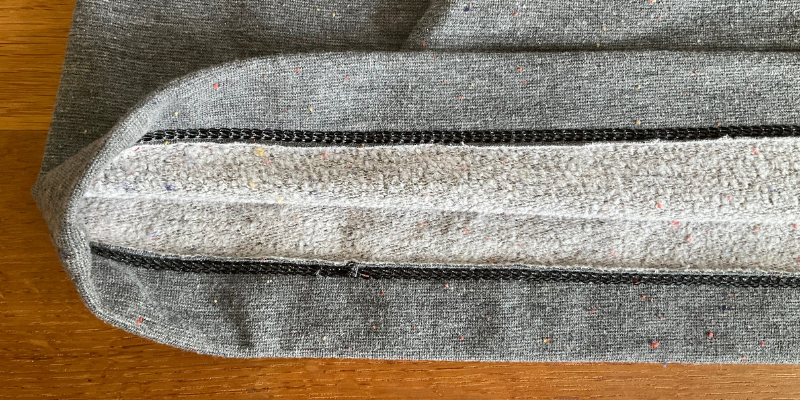
The finished cuffs, one shown inside out.

Side seams
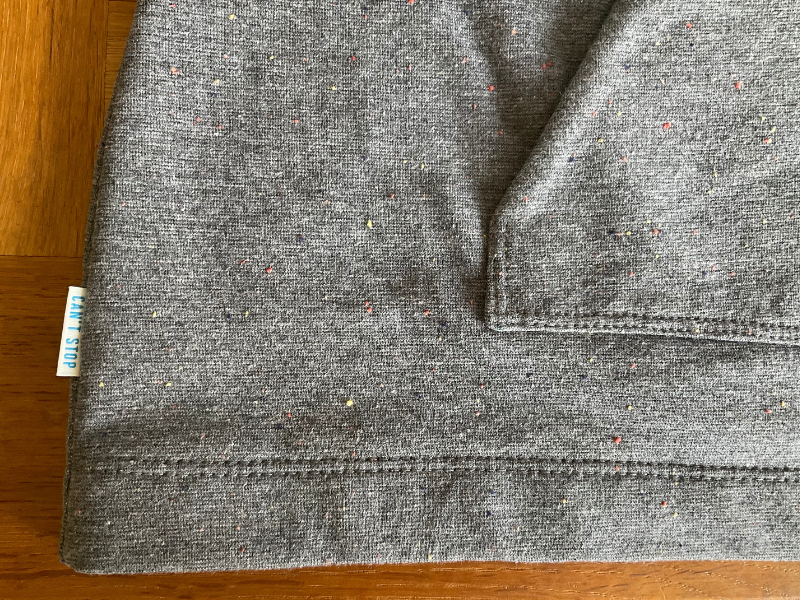
Since my sleeves and bodice were a different colour, I changed the thread in the left needle on the overlocker before sewing down the side seams. I added a little Kylie & The Machine side label that came in their 2021 advent calendar, securing it with the Sewline fabric glue pen before sewing.


Hem
I finished by coverstitching the hem which gave a lovely neat finish.


Summary
I’m really proud of this make as I learnt a lot and tried a few new things. I’m a little closer to figuring out my fitting issues which undoubtedly will be a journey that continues, and sewing it on the overlocker has given me more confidence in using it.
I really like the look of the colour-blocking on the finished garment, the eyelets give it a professional look and I love the wide flat drawstring. It’s such a wardrobe staple, I can see this being worn a lot.

Find me on Instagram, Facebook, YouTube, Bloglovin' or scroll to the bottom to subscribe to my monthly newsletter.
Links
I have no affiliations, I'm just a keen buyer and user. A UK supplier may be linked, please try to source items from your favourite independent stores.


Comments